Few important Steps to Install LED Strip Lights
Ways to install LED Strips Lights and Power Supplies

Step 1
- Measure the area where you plan on hanging the LED. Take a rough estimate of how much LED lighting you’re going to need. If you’re going to install LED lighting in different locations, measure each spot so you can cut the lighting to size later. Add the measurements together to estimate the total length of LED lighting you will need to purchase.
- Plan the installation before doing anything else. Try sketching the Idea of putting the LED light at and types of LED color (RGB), noting where you’re going to place the lights Indoor or Outdoor, any nearby power switch outlets you can connect them to.
- Be sure to count for the distance between the LED light location. Get a longer length of lighting or an extension cord as needed to fill in the gap to reach the switch outlets.
- LED strip and other supplies are available online – 123 LED Lighting Pte Ltd or our department stores at 10 Jalan Besar, #03-41, Sim Lim Tower, Singapore 208787 .
Step 2
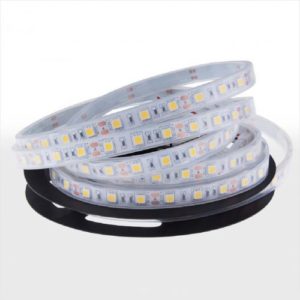
Check the LED to see what kind of voltage they require. Look at the product label on the LED strips. LEDs are either 12V or 24V. To keep your LEDs running long-term, you have to have a matching power supply. Otherwise, the LEDs won’t have enough power to operate. If you’re planning on using multiple strips or cutting LEDs into smaller strips, you can generally wire them to the same power source.
- The 12V lights are fit well in most locations and use less power. However, the 24V variety shines brighter and comes in longer lengths.
Step 3
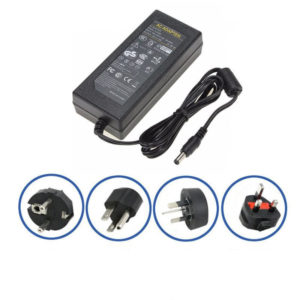
- Purchase a power supply that matches your power requirements. Find a suitable power supply matching both the maximum power rating in watts and the maximum power consumption of the LED strips amperage you calculated. The most common type of power supply is a brick-style adapter, similar to the ones used to power laptops.
Step 4
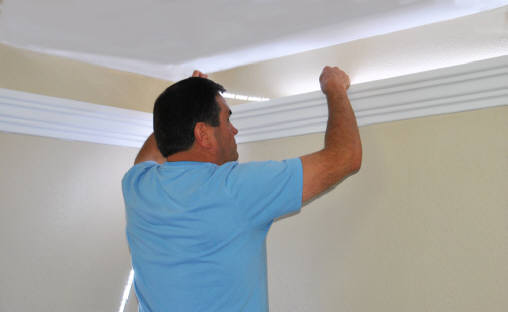
Peel the adhesive backing off and press the LED in place. LED lights are like stickers, so wait until you’re ready to put them on the wall before pulling the backing off. Start at one end of the surface, peeling the backing off of the initial LED light. Position it, press it flat by hand, then continue placing the rest of the strip.
- Take your time. Make sure the LED are in the right place so you don’t have to move them later.
- If the strip won’t stick to the surface, you may need to clean it again. Otherwise, you could get a mounting tape, velcro straps, mounting clips, or another tool to hold the lights in place.
Step 5
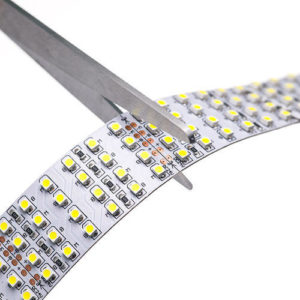
Cut the LEDs to size using the dotted guidelines on the strip. Unroll the length of LED lights you need, then find the dotted lines on each one. They are typically positioned, between copper dots cut through the line to sever the strip from the reel without damaging it. Make sure the strip is long enough for your project.
- Cut only at the specified mark. If you cut anywhere else, the strip won’t work. The copper dots are there so you can connect the strip to something else and still get it to work.
- Remember that each LED strip you cut has to be wired into the power supply or attached to a separate power supply. If you wish to make the process as simple as possible, don’t cut the LEDs unless you absolutely need to.
Power Supply
- If you’re planning on powering different LED strip separately, get power supply adapters for each one. Remember to calculate each one’s power requirement, since they may be different.power supply. The installation is tough and potentially dangerous, so call our or a certified electrician for assistance.
- If you have dimmable lights, select a power supply that is also dimmable. You could also place a dimmer switch between the power supply and the LED.
- Another option is to hardwire the LED strip to your existing electrical supply with a hardwire power supply. The installation is tough and potentially dangerous, so call our or a certified electrician for assistance.
- Use plug-in quick connectors if you need to join separate LED strip. Clip-on connectors fit over the copper dots at the end of the LED strip. These dots will be labeled with a plus or minus. Position the clip so the correct wire is over each dot. Fit the red wire over the dot marked as positive (+) and the black one over the dot marked as negative (-)
- Connect the LED to your power source with a quick connector. Your power supply will have a long cable with a plug at one end. LED strip also have a similar adapter at one end. The power adapter plugs into the one on the LED strip. If you cut off the LED plug, you could get buy another quick connector that attaches to the end of the strip.
If You Need Help in Installing Your LED Strip Lights
Contact Us by clicking the button below.
Call Us!